Trial of the Sekhemas
How a run works
This map shows your current progress on this floor of the Trial of the Sekhemas. Your journey will take you on a path from the entrance of the floor to the boss room on the right; you can't double back to enter previous rooms.
You can see a few rooms ahead, which will help you make a choice about what path to take. Your run ends if you lose all your Honour or Life.
Some rooms are Afflicted, and will apply Afflictions to you when you enter them.
Getting in
A Barya opens a trial. The campaign hands you your first one; after that they drop, and the area level of the Barya decides how many floors that run contains — one floor below level 45, two from 45, three from 60, all four from 75.

Balbala's Barya
Campaign — a quest drop, opens your first trial · drops from level 22

Djinn Barya
The repeatable entry coin; its area level decides how many floors you can reach · drops from level 24

Test of Strength Barya
Starts the run on Test of Strength · drops from level 65

Test of Will Barya
Starts the run on Test of Will · drops from level 65

Test of Cunning Barya
Starts the run on Test of Cunning · drops from level 65

Test of Time Barya
Starts the run on Test of Time · drops from level 65
The four floors
Each floor ends with a boss, and each has its own skip coin. The level shown is the Barya area level at which that floor becomes part of the run.
Test of Strength
Floor 1 · always included
Boss: Rattlecage, the Earthbreaker
Opened by Test of Strength Barya
Test of Will
Floor 2 · included from area level 45
Boss: Terracotta Sentinels
Opened by Test of Will Barya
Test of Cunning
Floor 3 · included from area level 60
Boss: Ashar, the Sand Mother
Opened by Test of Cunning Barya
Test of Time
Floor 4 · included from area level 75
Boss: Zarokh, the Temporal
Opened by Test of Time Barya
Honour and your defences
Damage taken inside the Trial drains Honour, and losing all of it ends the run — without killing your character. Honour carries from room to room and floor to floor within a run, and a fresh Barya starts you at full. Your gear still matters: each defence layer interacts with Honour loss differently, and since 0.5.0 your maximum Runic Ward is added to your starting Honour.

Armour
Mitigation prevents a portion of Resolve loss and scales with your Armour

Evasion
This scales with your Evasion Rating

Energy Shield
Up to 50% of Resolve loss from Enemy Hits is removed from the Aegis before Resolve or Inspiration
Aegis is broken when any Resolve is lost from Enemy Hits
Aegis is instantly restored after 4 seconds of no Resolve being lost
Resolve Aegis scales with your maximum Energy Shield
These popups still call the bar "Resolve", the name it carries internally, while the run UI labels it Honour.
Rooms you can path into (21)
You can see a few rooms ahead and choose your route, so knowing what each room offers is most of the strategy. Room types the game names differently on each floor list all four names.
Escape Trial
Hourglass Trial
Ritual Trial
Chalice Trial
Gauntlet Trial
Boss
Per floor: Collapsing Cavern · Ceremonial Chamber · Sand Pit · Outside of Time
Merchant
Contains Merchant
Honour Tabana
Awards a Shrine to restore Honour
Pledge to Kochai
Awards a Pledge which can be accepted to change the Trial's Parameters
Honour Halani
Awards a Shrine to restore Honour and gain Sacred Water
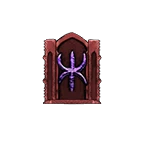
Honour Ahkeli
Awards a Shrine that greatly restores Honour and burdens you with an Affliction
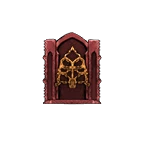
Honour Orbala
Awards a Shrine that restores Honour and grants you a Boon
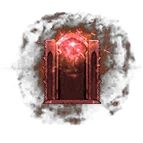
Honour Galai
Awards a Shrine that bestows the fickle Blessings of the Wind
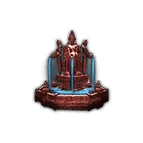
Fountain
Awards a Large Sacred Water Fountain
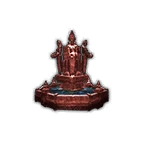
Fountain
Awards a Sacred Water Fountain
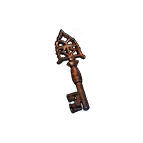
Bronze Key
Awards Bronze Key
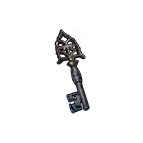
Silver Key
Awards Silver Key
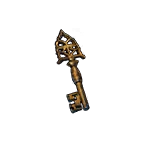
Gold Key
Awards Gold Key
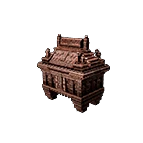
Bronze Cache
Awards a Bronze Cache. Requires a Bronze Key to Open
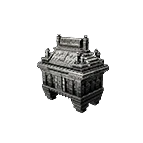
Silver Cache
Awards a Silver Cache. Requires a Silver Key to Open
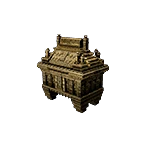
Golden Cache
Awards a Gold Cache. Requires a Gold Key to Open
Fountains and caches
What the objects inside a room actually give you.
- Restore {0} of your Honour
- Restore {0} of your Honour Gain a random Boon
- Restore {0} of your Honour Gain a random Minor Affliction
- Restore {0} of your Honour Gain a random Boon Cleanse a random Affliction
All 91 effects a run can apply to you, with the game's exact wording. Minor Afflictions and Boons can escalate into their Major versions when the same effect lands twice.
Minor Boons (24)

Assassin's Blade
The next 10 non-Boss Monsters you Hit are killed Instantly

Balbala's Gift
Your next purchase from the Merchant has no cost

Black Pearl
Traps deal 50% reduced Damage

Chipped Dice
The Merchant's Shop can be Rerolled

Diverted River
Sacred Water found on this floor is doubled

Enchanted Urn
30% increased Effect of your Non-Unique Relics

Flooding Rivers
50% more Sacred Water found

Fright Mask
Monsters deal 20% less Damage

Glowing Orb
The next time you go below 20% of Maximum Life, restore all Life, Energy Shield and 50% of Honour

Hare Foot
40% increased Movement Speed

Honoured Challenger
50% increased Honour restored

Lustrous Lacquer
You have 50% more Armour, Evasion and Energy Shield

Lustrous Pearl
Traps are slower

Mirror of Fortune
The next Key you pick up is duplicated

Moment's Peace
You cannot be Damaged until you complete the next room

Orbala Statuette
You have 25% more Maximum Honour

Ornate Dagger
You and your minions deal 50% more Damage

Sanguine Vial
Monsters have 30% less Maximum Life

Scrying Crystal
You can see an additional room ahead on the Trial Map

Silver Chalice
The next Minor Boon you gain is converted into a random Major Boon

Silver Tongue
50% reduced Merchant prices

Upward Path
Your Sacred Water found is increased by 10% on room completion (removed when you purchase something from the Merchant)

Viscous Ichor
Monsters have 15% reduced Action Speed

Wooden Effigy
UNUSED
Major Boons (12)

Ahkeli's Guard
You cannot be Damaged for 1 second after taking Damage from an Enemy Hit

All-Seeing Eye
The Trial Map is fully revealed

Crystal Shard
The next Affliction you gain is converted into a random Minor Boon

Dekhara's Necklace
You cannot receive any more Minor Afflictions

Garukhan's Favour
Ignore the first Damage taken from an Enemy Hit in each room

Holy Water
Gain a random Minor Boon when you venerate a Maraketh Shrine

Imperial Seal
Traps are Disabled

Orbala's Leathers
Upon reaching 0 Honour, revive once with 50% less Honour

Raincaller
Sacred Water found is doubled

Reparations
Gain 2 Sacred Water when you take Damage from an Enemy Hit

Sacred Mirror
Keys you pick up are duplicated

Sekhema's Cloak
Upon reaching 0 Honour, revive once with full Honour
Minor Afflictions (40)

Black Smoke
You can see one fewer room ahead on the Trial Map

Blunt Sword
You and your Minions deal 40% less Damage

Chains of Binding
Monsters inflict Binding Chains on Hit

Costly Aid
Gain a random Minor Affliction when you venerate a Maraketh Shrine

Dark Pit
Traps deal 100% increased Damage

Deceptive Mirror
You are not always taken to the room you select

Dishonoured Tattoo
100% increased Damage Taken while on Low Life

Exhausted Wells
Chests no longer grant Sacred Water

Fiendish Wings
Monsters' Action Speed cannot be slowed below base Monsters have 25% increased Attack, Cast and Movement Speed

Forgotten Traditions
50% reduced Effect of your Non-Unique Relics

Gate Toll
Lose 30 Sacred Water on room completion

Golden Smoke
Rewards are unknown on the Trial Map

Haemorrhage
You cannot restore Honour (removed after killing the next Boss)

Honed Claws
Monsters deal 30% more Damage

Hungry Fangs
Monsters remove 5% of your Life, Mana and Energy Shield on Hit

Iron Manacles
You have no Evasion

Leaking Waterskin
Lose 20 Sacred Water when you take Damage from an Enemy Hit

Low Rivers
50% less Sacred Water found

Myriad Aspersions
When you gain an Affliction, gain an additional random Minor Affliction

Purple Smoke
Afflictions are unknown on the Trial Map

Rapid Quicksand
Traps are faster

Red Smoke
Room types are unknown on the Trial Map

Rusted Mallet
Monsters always Knockback Monsters have increased Knockback Distance

Season of Famine
The Merchant offers 50% fewer choices

Sharpened Arrowhead
You have no Armour

Shattered Shield
You have 50% less Energy Shield

Spiked Shell
Monsters have 50% increased Maximum Life

Suspected Sympathiser
50% reduced Honour restored

Tattered Blindfold
90% reduced Light Radius Minimap is hidden

Trade Tariff
50% increased Merchant prices

Tradition's Demand
The Merchant only offers one choice

Untouchable
You are Cursed with Enfeeble

UNUSED
You can have a maximum of 5 Boons

UNUSED
Guards release a Volatile Anomaly on Death

UNUSED
Guards are accompanied by a Gargoyle

UNUSED
Every room grants a random Minor Affliction (Afflictions granted this way are removed on room completion)

UNUSED
Chests in rooms explode when opened

Weakened Flesh
25% less Maximum Honour

Winter Drought
Lose all Sacred Water on floor completion

Worn Sandals
30% less Movement Speed if you've been Hit by an Enemy Recently
Major Afflictions (12)

Branded Balbalakh
Cannot restore Honour

Chiselled Stone
Monsters Petrify on Hit

Corrosive Concoction
You have no Armour, Evasion and Energy Shield

Deadly Snare
Traps deal Triple Damage

Death Toll
Monsters no longer drop Sacred Water

Ghastly Scythe
Losing Honour ends the Trial (removed after 3 rooms)
Counts down a room at a time

Glass Shard
The next Boon you gain is converted into a random Minor Affliction

Orb of Negation
Non-Unique Relics have no Effect

Unassuming Brick
You cannot gain any more Boons

Unquenched Thirst
You cannot gain Sacred Water

UNUSED
Rooms spawn Volatile Anomalies

Veiled Sight
Rooms are unknown on the Trial Map
Pledges (3)

Pledge to the Afflicted
10% reduced Honour Restored

Pledge to the Deserted
Monsters do not drop Sacred Water

Pledge to the Powerful
100% more Honour lost in non-Boss Rooms
Adrenaline Vial, Death Toll, Earned Honour, Fountain of Youth, Pledge to the Guileful, Spiked Exit also exist, but the game assembles their effect text at runtime from values it formats itself — so they are listed by name rather than shown with numbers we can't state exactly.